1) placing images
Want to get a photo into your Illustrator layout but not sure how? Go to FILE / PLACE and check the box that says LINK. This will keep your Illustrator file lower in file size and allow you to automatically update it if you should modify the photo after placing. Note: you will have to keep the photo along with the Illustrator file in order for it to continue to appear in the layout. (If you’re not going to make further changes to the photo and don’t want to risk losing a separate file, you can leave LINK unchecked and it will EMBED the photo, increasing your layout’s file size.)
2) using the pathfinder tool
You probably already know that you can make basic shapes with the shape tool: rectangles, rounded rectangles, ellipses, polygons (including triangles), stars and flares (as well as perfect squares and circles by holding down the SHIFT key when creating rectangles and ellipses), but did you know that you can create ANY shape conceivable if you use the pathfinder tool? Just go to WINDOW / PATHFINDER if you don’t see the PATHFINDER panel in your workspace and review its tools: UNITE, MINUS FRONT, INTERSECT, EXCLUDE, DIVIDE, TRIM, MERGE, CROP, OUTLINE, and MINUS BACK.
Unite Combines all the selected objects and merges them into a singe shape. If the objects are different colors, the merged shape takes on the attributes of the top-most object.
Minus Front Uses the top object(s) as a sort of “cookie cutter” to subtract their shapes from the bottom object.
Intersect Deletes everything that does not overlap, and combines the rest into a single shape.
Exclude The opposite of Intersect. Instead of getting rid of everything that isn’t overlapping, it gets rid of everything that does overlap. The resulting shapes become a compound path.
To not overwhelm you here, I recommend just playing around with the tool. Create a rectangle with two circles on either end. Select all three and then choose UNITE from the PATHFINDER tool and voilà—you have a barbell! The possibilities are endless, especially when you consider that you can create any shape with the pen tool and/or manipulate a basic shape’s points in addition to the PATHFINDER tool.
3) setting type & creating outlines
In addition to the font size (measured in points), leading (space between lines) and kerning/tracking (space between characters) controls that allow you to set type exactly as you wish, you can create outlines of your type so that the letters become shapes. While you’ll no longer be able to edit or revise the text, the shapes can be used as a mask, so you can have a photo appear inside the letters, for example. I know you want to do that, but first select the text and choose CONTROL/COMMAND + SHIFT + O on your keyboard, or choose TYPE / CREATE OUTLINES from the menu.
4) making clipping masks
You can create what’s called a clipping mask to have a photo or pattern appear to fill an object or, as stated in #3, outlined type. To create a clipping mask, you’ll need to place a photo (see #1) and create a shape (#2) OR outlined type (#3) first. Then, making sure the shape/outlined type is on top of the photo (RIGHT CLICK / ARRANGE / SEND TO FRONT), select both the photo and the shape/outlined type and choose CONTROL/COMMAND + 7 on your keyboard, or OBJECT / CLIPPING MASK / MAKE from the menu. Note: if you have a word(s) and you want all of the letters to act as one clipping mask, you’ll need to create a compound path of the letters first by selecting them and choosing CONTROL/COMMAND + 8 on your keyboard, or OBJECT / COMPOUND PATH / MAKE from the menu.
Want to try these tips out but don’t have Illustrator? No problem, click on this link and get a 30-day trial absolutely FREE!
If you’re not already on my webinar list, sign up here:
5) transforming objects
There are so many ways to transform an object after you’ve created it. In addition to ROTATE, REFLECT, SCALE, SHEAR, and RESHAPE tools in the toolbar, you have a ton of choices in the OBJECT and EFFECT menus, not to mention the TRANSFORM panel. One of my favorite tricks is to select flip vertically or flip horizontally from the OPTIONS menu at the top of the TRANSFORM panel.
6) using guides & aligning objects
Illustrator has many built-in ways for you to ensure that elements in your layout are in alignment. Some designers work with SMART GUIDES (CONTROL / COMMAND + U) which provides a visual guide and information for you once you select an object, but I tend to prefer to turn these off and utilize the ALIGN panel to select objects and then align them to themselves or to the artboard (the white area of your document) and/or utilize GUIDES. You can create guides (lines that are visible onscreen but that do not print) for yourself wherever you want! First, show the RULERS, by selecting CONTROL / COMMAND + R from the keyboard or by choosing VIEW / RULERS / SHOW RULERS from the menu. This will give you the horizontal and vertical measurements of your document, and from these ruler areas, you can pull out GUIDES. Move your mouse into the RULER on the left side of your screen, click down and drag out to place your vertical ruler wherever you like. Do the same by going to the top RULER and clicking and dragging down. You can have as many guides as you like! Just right click an empty area on your artboard to HIDE or LOCK GUIDES. You can also make a guide from any object, by selecting it and selecting CONTROL / COMMAND + 5 or by choosing VIEW / GUIDES / MAKE GUIDES from the menu. You’ll also see in this menu that you can CLEAR GUIDES there as well.
7) utilizing shortcuts
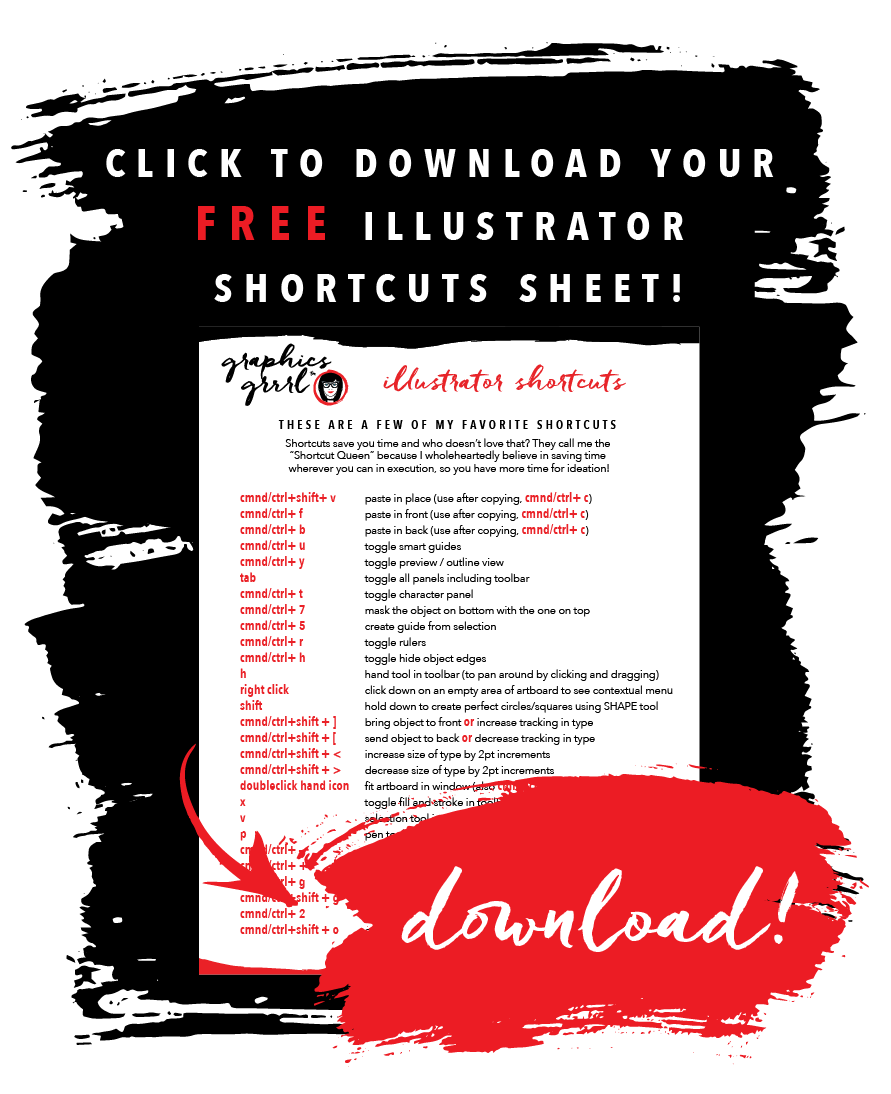
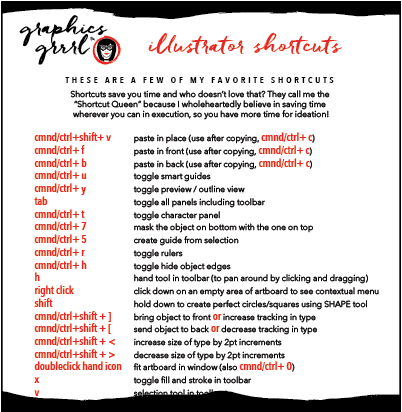
By now you’ve probably noticed why they call me the “Shortcut Queen”! I do loves me a keyboard combination to do something faster than dragging my mouse up to the menu. But I do acknowledge that not everyone works in the same way. I’m always amazed when I see someone right clicking to copy and paste, when to me CONTROL / COMMAND + C and CONTROL / COMMAND + V (P is already taken for PRINT) is so much faster. I think the adoption of a shortcut should be in direct correlation to how often you use it. So, for me, using shortcuts for copy and paste is a no-brainer given how often I do that—and given how widespread this command is used across so many programs, not to mention the overall operating system.
Download a FREE handy dandy Illustrator shortcut sheet that you can keep by your computer while you work here:
8) layering artwork
Like Photoshop, Illustrator allows you to put artwork on different layers so selecting just the object you want becomes easier. To do this, go to WINDOW / LAYERS if you don’t see your LAYER panel in your workspace. At the bottom of the layers panel, you can create a new layer or delete a layer. In addition to showing and hiding a layer with the EYE ICON on the left side of each layer, you can reorder your layers buy clicking on a layer and dragging it to the position you want. Like rings of an onion, the layers that appear above the others (closer to the top of the panel) will be the outermost or visually appear to be on top of the others. To duplicate a layer, select the layer with your mouse and drag it over the NEW LAYER icon at the bottom of the panel. Of course you can always select the OPTIONS menu at the top of the panel to create a new or delete layers and so much more. And it’s super convenient that Illustrator gives each layer its own unique color for guides, as well!
